Vinyl Lettering Installation Instructions, Print out the PDF. Download & Print Out Install Instructions
Dry Installation Method:
Tools and cleaner suggested :
Surface cleaner such as Denatured or Isopropyl alcohol work best for cleaners, or glass cleaner with ammonia in a pinch.
Tools that we suggest for install are scissors or exact-o knife, masking tape, squeegee or credit card, and a measuring tape.
Your Vinyl Lettering Consist Of 3 Layers.
-
- The top layer is called masking tape, also known as the Transfer Layer, this holds the letters in place during installation.
- The middle layer is the actual Vinyl Lettering.
- The bottom layer is the non stick wax paper backing, This shields the Vinyl Lettering’s self-adhesive backing.
Please Review this Image.

Remove your decal from the packaging, lay the decals flat on a clean surface.
Starting from the center and working towards the sides, run the squeegee gently over the front and back of decal to ensure proper adherence and to help alleviate wrinkles.
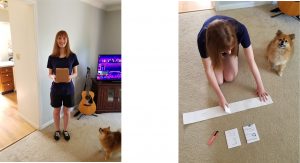
Step 1: Clean the install surface, then measure the installation area with measuring tape to find the center point.

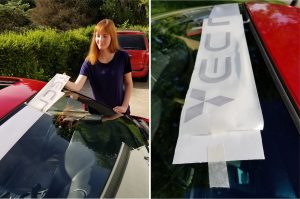
Step 2: Place the lettering sheet against the intended installation surface. Now with the masking tape facing you and the backing still on, Run a strip of masking tape down the center (between the letters if possible). Then Secure all four corners with tape.

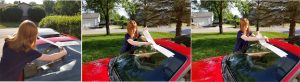
Step 3: Choose one side and remove the corner tape. Gently and slowly pull away the backing at a 45 degree angle to prevent stretching or tearing the decal. Stop when you reach the center tape line. Once you have this pulled back, use the corner piece of the masking tape that you used to hold the decal in place, and stick it to the top of the decal temporarily.
Step 4: Cut the wax paper backing off near the cross section of the center tape hinge. Then carefully place the exposed vinyl lettering against the surface and squeegee firmly down in a X pattern across the decal, starting from the center and working outward. The squeegee should stay in direct contact with the surface of the vinyl as much as possible in order to push out air bubbles.
Step 5: Once the first half is installed, remove all of the masking tape that you used to secure the material to the window. Lift the remaining uninstalled material up and slowly pull away the remaining backing at a 45 degree angle.
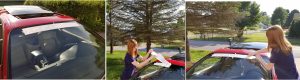
Step 6: When finished, very gently peel away the top layer of masking tape.
Caution: removing the masking tape too quickly can damage the material.
Step 7:
Congratulations You’re done! Once the installation is complete, all that should remain is your custom vinyl lettering.